1. Outline
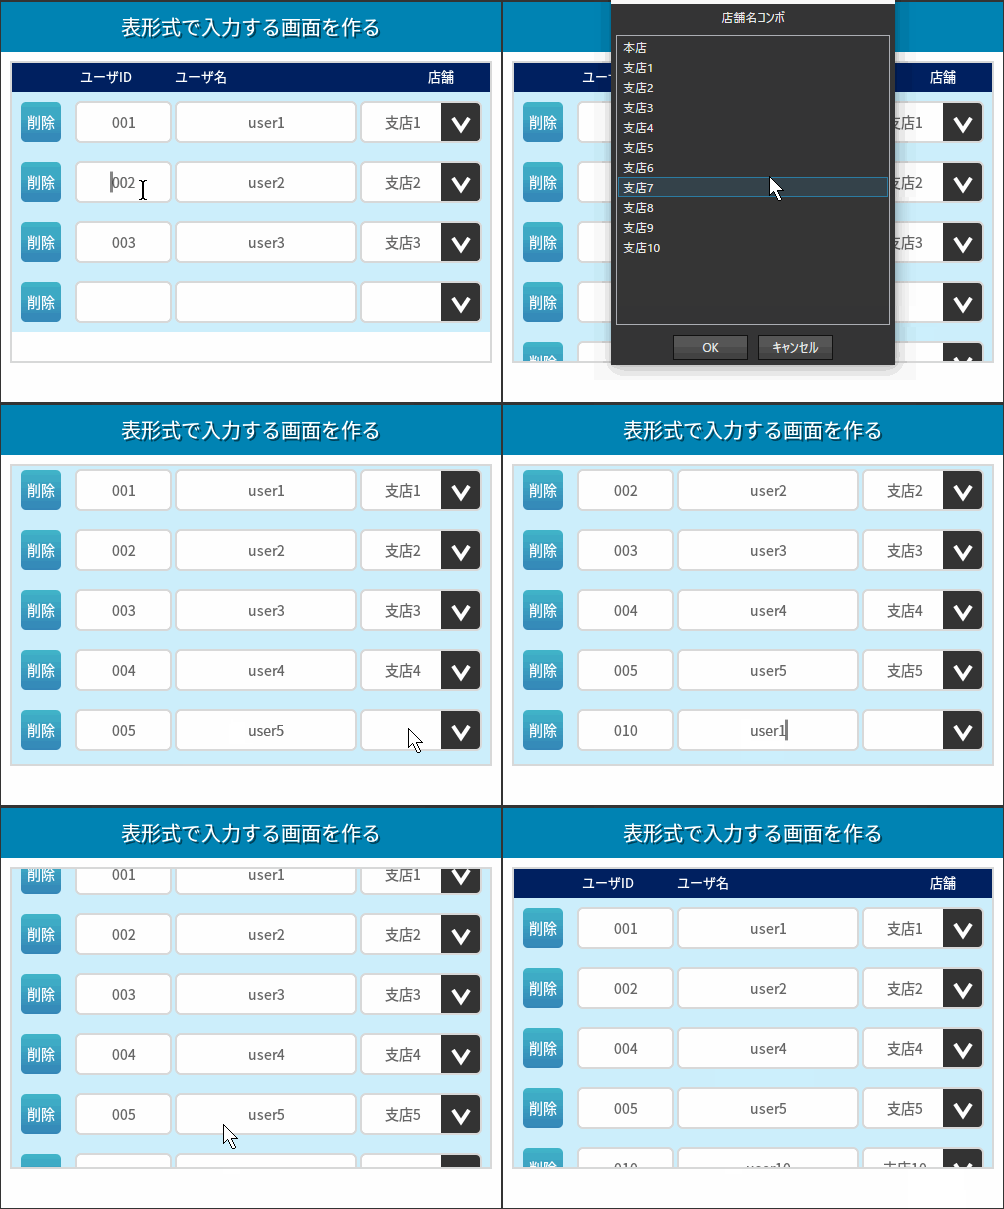
A sub-screen created using a sub form control and displayed repeatedly in list form is called a sub form list. The Subform List allows you to repeatedly display sub-screens with input forms and other items in a list format.
This article describes the development of applications that utilize subform lists. Please take a look at the following cases that can be handled.
- I want to repeat entries and display them in a tabular format.
- I want to create a screen that repeatedly displays the same item.
- I want to set up a table (list) linked to the database in the application.
The sample project used in the explanation can be downloaded from the following link. We hope you will take advantage of it.
2. Operation image

3. Implementation method (explanation of key points only)
After creating screens and data tables, set up data forms. Data forms are a useful feature that allows you to link screens and tables together to achieve things such as reading and writing data. Please take advantage of it.
3-1. Screen Creation
3-1-1. Main Screen
Create a new screen and place a sub form in it as follows. Sub forms can be placed by selecting "Sub Forms" from the control bar and dragging them on the screen.
(1) Main screen
(2) Sub form: A sub form is another child screen placed inside the main screen.
3-1-2. Sub Screens
In this case, we will create two sub-screens: a header screen and a list screen.
Header Screen
Header area for subform listings. The names of the input items are user ID, user name, and store. Create a new screen, the height of the screen should be just enough to allow for item entry, and the width should match the width of the sub form area. Utilize labels to enter items. If a horizontal screen like the one below is created, it is complete.

list screen
Subform list input area. Create three areas to allow entry of user ID, user name, and store. In the sample, user ID and user name are text boxes and store is a combo box. Also, place buttons for deletion, editing, etc. as appropriate.

3-1-3. Sub form parameter settings
Select the sub form area of the main screen created in 3-1-1 and set various parameters.
From "Object" > "Behavior Setting," specify the header screen created in 3-1-2 for "Header" and the list screen also created in 3-1-2 for "Details. When doing so, be sure to check the "List View" checkbox at the bottom.

3-2. Creation of data tables
Create and configure data tables from the DB function. After generating a new data table, set up the items in the following manner so that the user ID, user name, and store entries can be saved, respectively.
3-3. Data form settings
Select the list screen created in 3-1 and configure the data form.
First, with the entire listing screen selected, specify the data file created in 3-2 in "Table Name" under "Data. This activates the data form, and the information entered in the list is reflected (added or updated) in the data table, thus linking the screen to the data table. Also, by checking the "Show New Row" checkbox, the list screen of unfilled listings will be automatically displayed in the subform.

Next, also set up a data form for each control placed in the list screen, as shown below.
After selecting each control, select "Data" > "Contents" > "Form" and specify the corresponding item in the table as the "Field Name.

3-4. Deletion process settings
Since the deletion process cannot be implemented in the data form alone, a separate delete button is created and the logic for the deletion process is implemented.
3-4-1. Creating Data Deletion Logic
The logic is as follows Only important points will be explained. (Green area)

#6: *Delete DB
If a record matching the selected row id exists in the specified data table, the process deletes the record. The parameter settings are as follows Search for the "id" field in the "tbl_User" table and delete the field with the same id as the id obtained in #5: "id" process above.

13: *Read after deletionImportant
This process is used to reflect the deleted results on the screen.
To redraw within a subform, use "Data Set > Read". Note that the "Control > Update" logic will not redraw.

3-4-2. Logic Registration
Register the logic you have just created to the Delete button on the List screen. Register logic to "Execution Processing" from "Object" > "Behavior Setting" in the property area.

This completes the configuration of the subform list.
Run the application from the "Run" button on the menu icon. Verify that test data can be entered in the subform list and that a new subscreen appears automatically after entry.
You can also stop project execution with the "Stop" button on the menu icon and check the "stored data" from the DB design function. Press the "Reload" button, and if the test data entered earlier is confirmed, you have succeeded. The same procedure can be used to confirm that data in the database can be deleted from the Delete button in the subform list.
