1. Outline
The Unifinity application can display images utilizing label controls, etc., and can also store the displayed images in a database.
This article explains how to directly display image files retrieved via the Internet or images registered with a resource, save them to a database, load the saved images from the database, and display them on the screen again.
Please take a look at the following cases that we can help you with.
- I want to view image files downloaded from the Internet.
- I want to display the image files defined in the resource.
- I want to store images in a database.
- I want to display images stored in the database.
The sample project used in the explanation can be downloaded from the following link. We hope you will take advantage of it.
2. Operation image
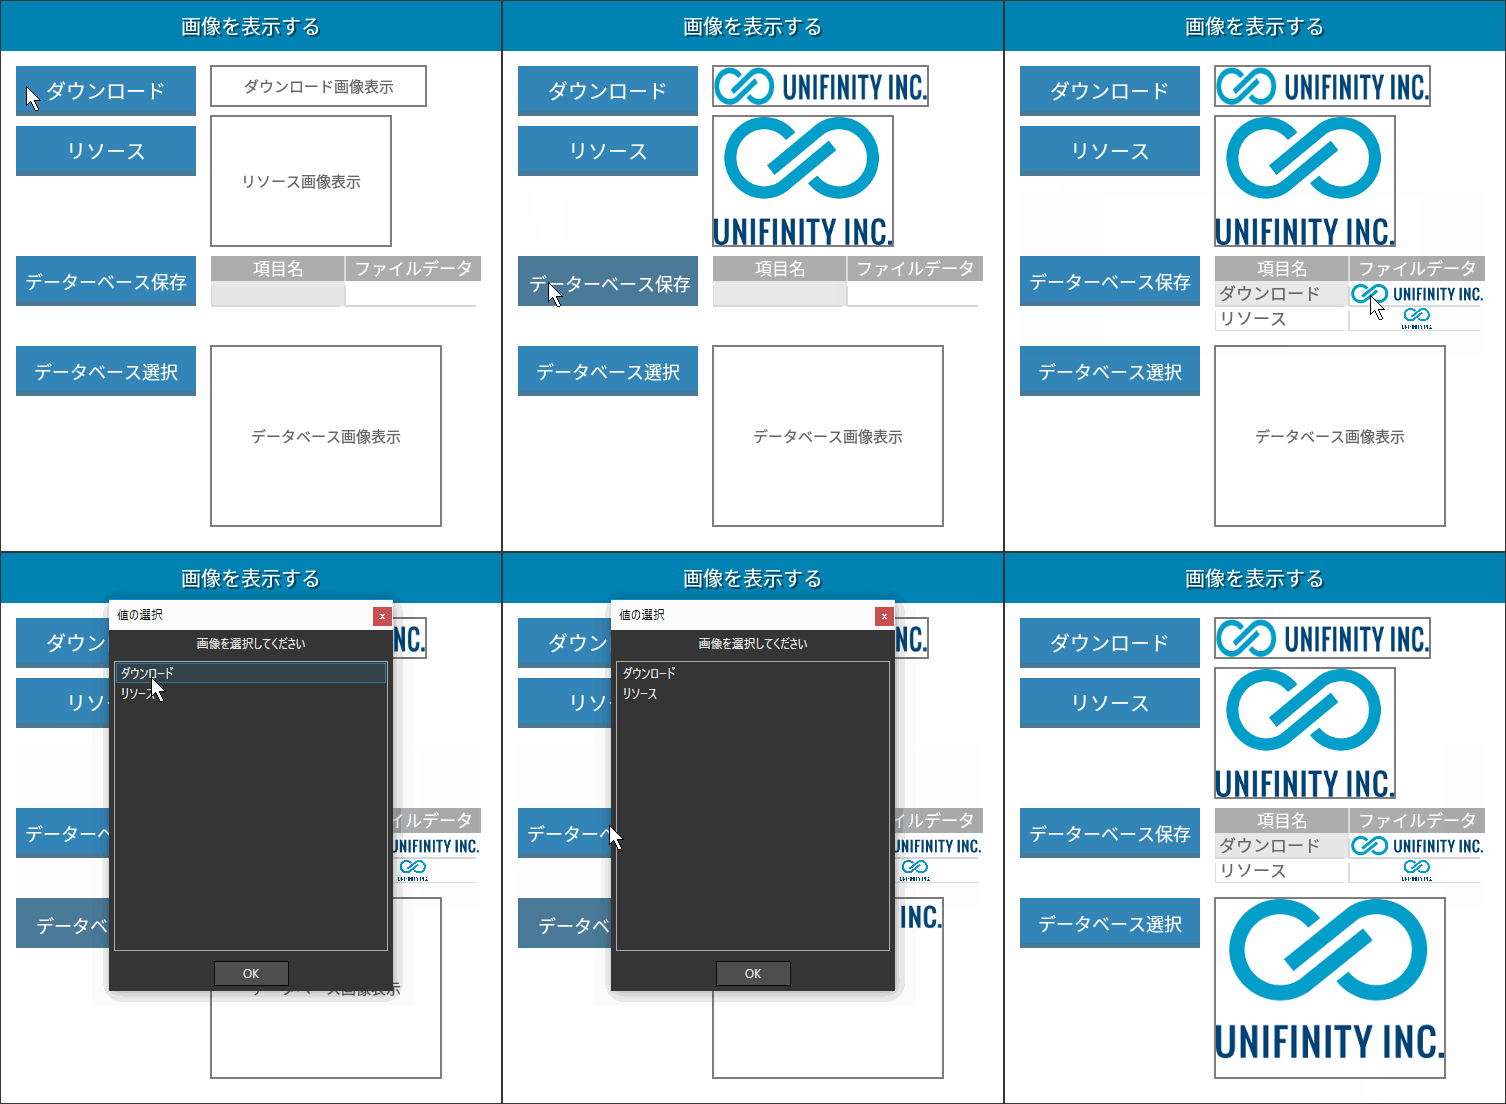
3. Implementation method (explanation of key points only)
3-1. Screen Creation
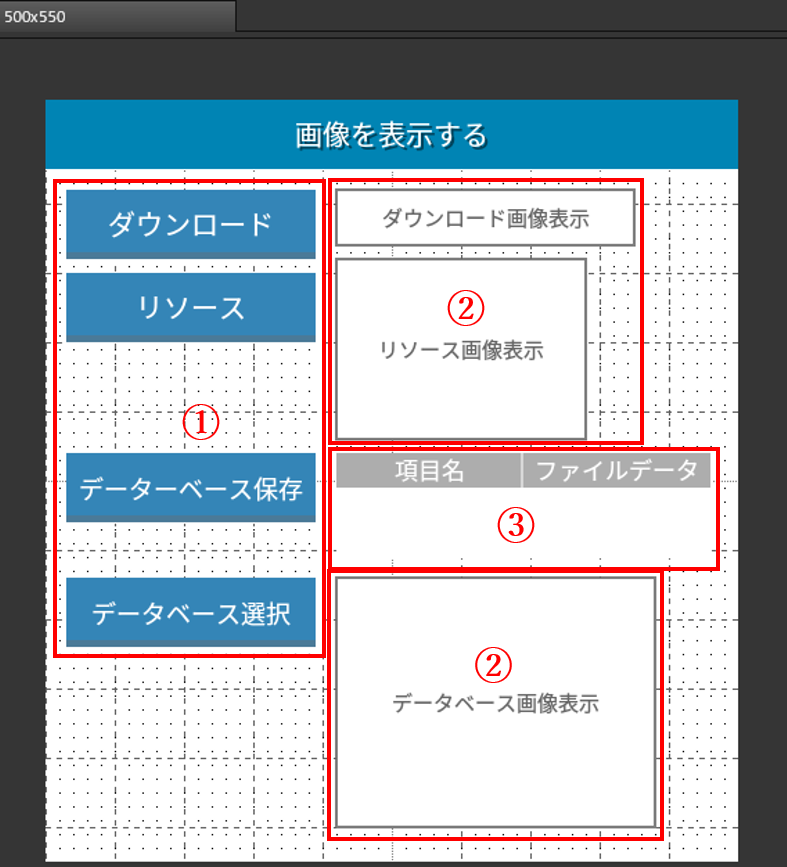
Create a new screen as follows, and place controls for buttons and labels, and a table control to display the contents of the data table.
(1) Button
(2) Label
(c) table
3-2. Table Creation
Create and configure tables for storing images. Add an item to allow saving of image names and image data. Please select the binary type for the image data type.
3-3. Creating download logic
Create the logic to be used for downloading and register the logic in the download button.

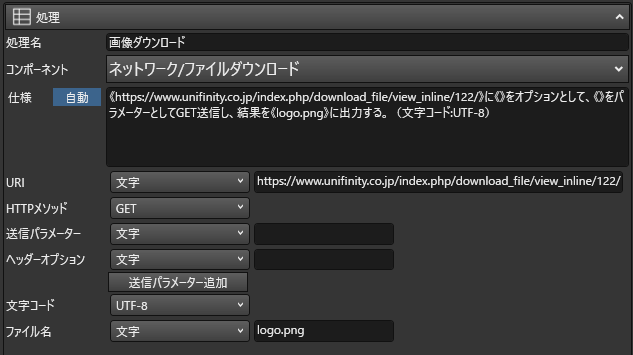
The logic used for the download is as follows

#1 Logic to download files from the network.
HTTP communication is performed to the URI of the image file to download the file.
The downloaded file is saved in the application area as "logo.png".
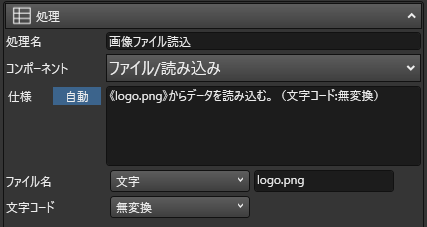
#2 Load an image file. Load "logo.png" obtained in #1 above as a file.
The created logic is registered in the "Download" button.
3-4. Creating Resource Call Logic
Create the logic to call the resource image and set it on the button. The image must be registered in the resource in advance.

Resource images are registered by setting "keywords" from "Properties" > "Resources". keyword is used to invoke a resource.
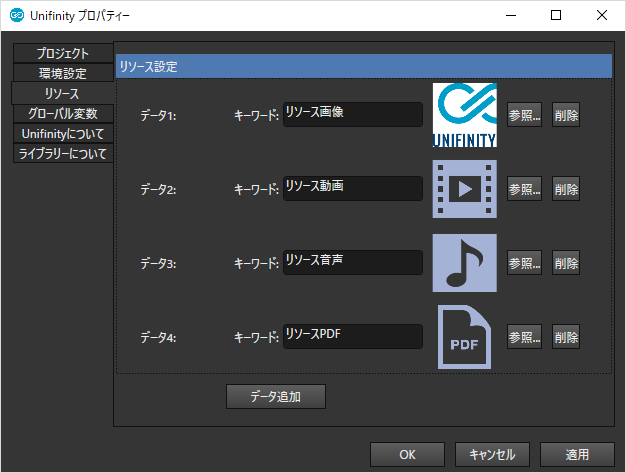
The logic used for resource loading is as follows
 #1 Calls an image from a resource. Specify the keyword you have just set for the "Resource KEY" parameter.

The created logic is registered in the "Resource" button.
3-5. Creation of database storage logic

Create logic to store image data in a database after retrieving it. The logic for saving is as follows

#1 Obtain the logo.png generated by the download logic created in 3-3 above.
#2 Write the logo.png obtained in #1 into the data table created in 3-2.
#3 Acquire the resource images registered in 3-4 by specifying keywords.
#4 Write the resource image obtained in #3 into the data table created in #2.
The stored data is written to a table. You can check the data from "Stored Data" in the DB design function as follows. Pressing the "Reload" button updates the data in the table to the latest state.
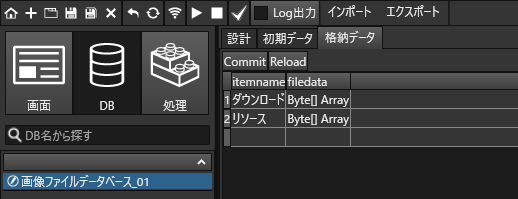
The created logic is registered in the "Save Database" button.
3-6. Creation of image data retrieval logic

Retrieves image data by specifying the name of the image stored in the table.
This section is set up so that the name of the image can be specified from the list displayed in the pop-up window. The logic required is as follows
#1 is the logic to display a popup to select the name of the image stored in the table. Parameters are set as follows
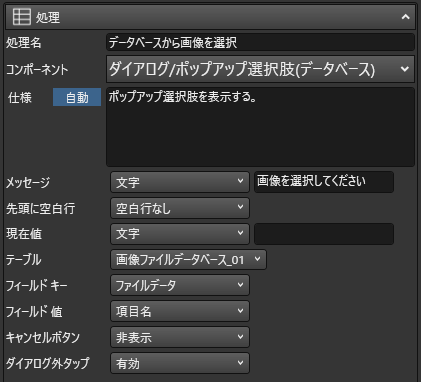
The "field key" stores the image.field, "Field Value" specifies the field to be displayed as a pop-up choice.
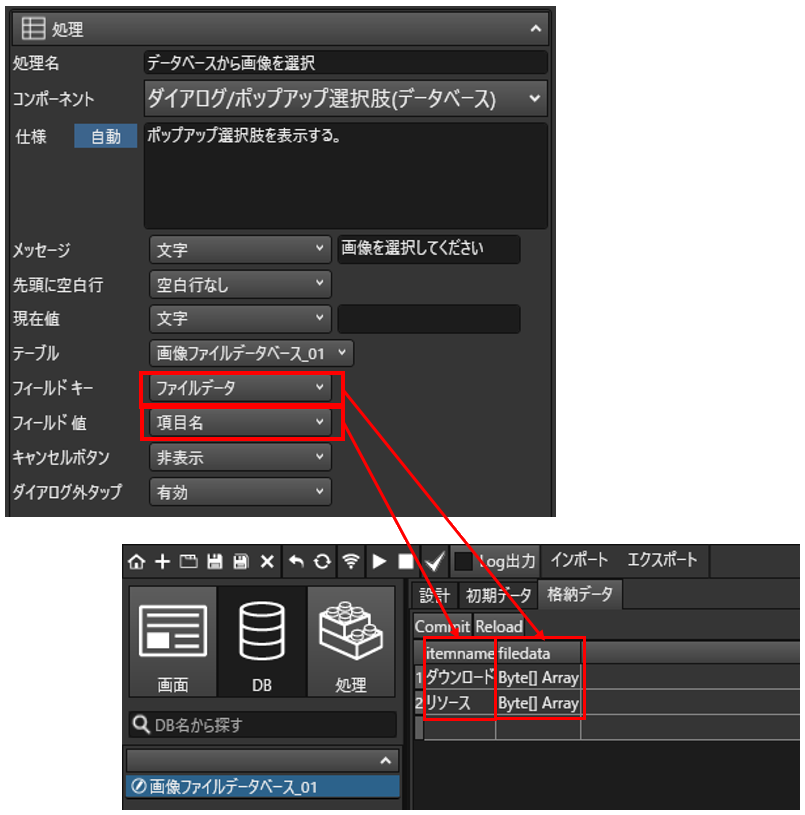
The created logic is registered in the "Select Database" button.
This completes the setup for downloading images and storing them in the database.
Run the application from the "Run" button on the menu icon to see if it works correctly.
After displaying the respective images from the "Download" and "Resource" buttons, press the "Save Database" button to write the displayed image data into the database. Recall the saved data from the "Select Database" button and verify that the data has been properly saved.
