1. Outline
Unifinity applications can be integrated with Excel and other Windows applications.
This article describes how to output what you type on the Unifinity application screen to Excel.
It can be conveniently utilized in the following cases
- I want to output reports in a predefined format.
- I want to tabulate the data entered in the application in Excel.
- I want to create a CSV file and import it into another system.
The sample projects used in the explanation can be downloaded from the following links. We hope you will take advantage of it.
2. Operation image
When the logic is executed by specifying the rows and columns of a cell in the application and filling in the contents, the contents are transcribed to a given Excel file. This is the basic movement of Excel output.

3. Mounting method
3-1. Setting up the screen
First, we will create the required screens. Create a new form from the screen design function, select a control from the control bar on the left, and place it on the created form. Settings for the placed controls are made from the properties area on the right.
3-1-1. Create Excel Open Screen
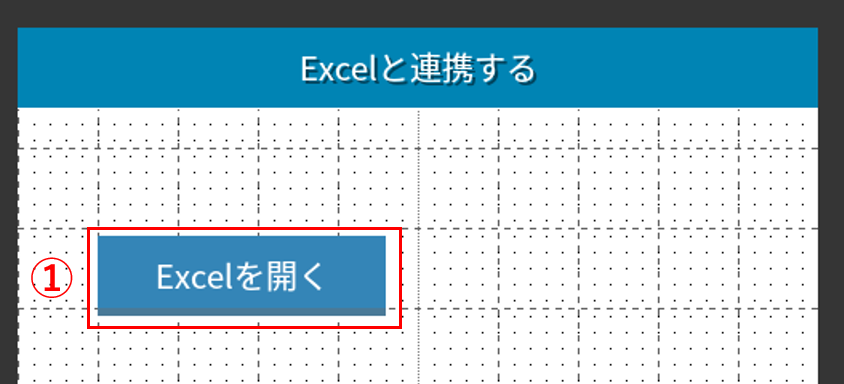
Create a new screen as follows and place a button control in it.
(1) Button
3-1-2. Create an Excel linkage screen
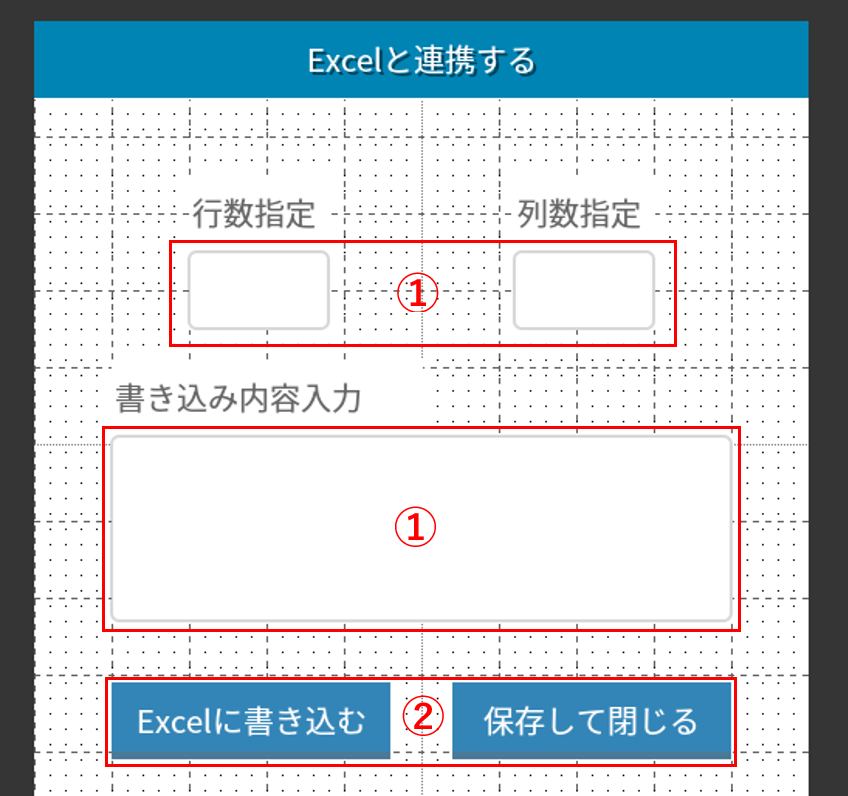
Create a new screen as follows and place buttons and text controls in it.
(1) Text box
(2) Button
3-1-3. Set up a text box
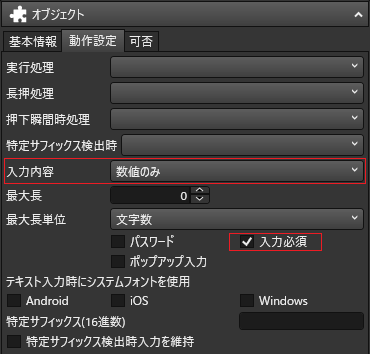
Configure the "Row Positioning Text" and "Column Positioning Text" settings created in 3-1-2. Specify "Numeric value only" for "Object" > "Behavior Setting" > "Input Contents". Then please leave the "Required" checkbox checked.
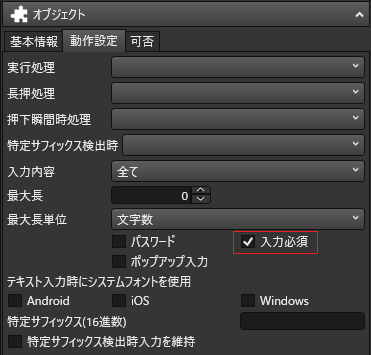
Set up the "Writing content input text," also created in 3-1-2. Check "Object" > "Behavior Settings" > "Input Required".
3-2. Open Excel
Create logic to open the destination Excel file before outputting Excel.
The logic used to open Excel is as follows

Open the dialog in #1 and select the file you want to open. Record the path to the file opened in #2. Open the selected file at #3 and move to the form to specify the contents of the Excel output at #4.
To create a new Excel file, right-click in the dialog to create a new file.
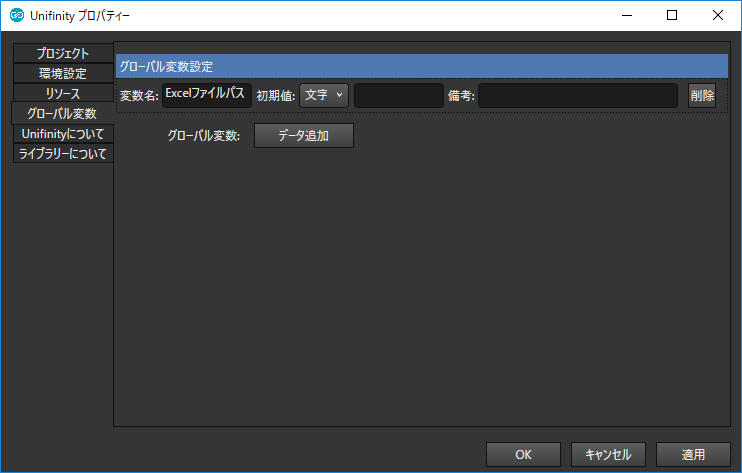
Set global variables before executing the logic in #2. Global variables are registered by setting the "variable name" from "Properties" > "Global Variables".
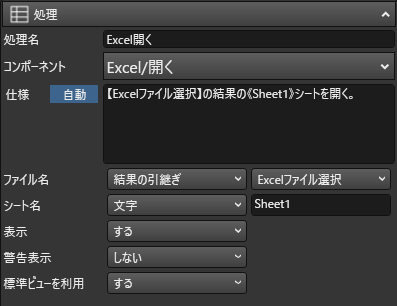
The parameters involved in the #3 logic are as follows
3-3. Write in Excel
Create logic to write data to the Excel file opened in 3-2 and register the logic to the "Write Excel" button.
The logic used for Excel writing is as follows

#1 is the logic for determining the input content. If the required text has not been entered, a message is displayed and the process is aborted. If not already entered, proceed to #2 and beyond. #2 through #4 are the logic to retrieve the value entered in each text box. Writes to an Excel file based on the values obtained in #5.
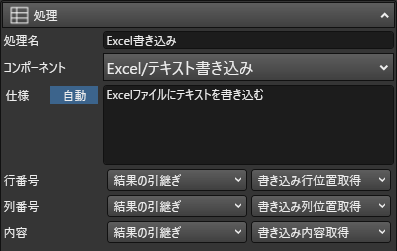
#5The parameter settings for Excel writing are as follows Row number, column number, and write content can be specified respectively.
3-4. Creating Excel Save Logic
Create the logic to be used when saving the written Excel file. The created logic is registered in the "Excel Save" button.
The logic to be created is as follows

In #1, retrieve the global variables set in 3-2, save the Excel file with the retrieved file path, and close the open Excel file in #3. At #4, reset the value of the global variable and return to the "Excel Open Screen" at #5.
The parameter settings for #2 "Save Excel File" are as follows

This completes the setup of the application to output to Excel.
Make sure that the logic you created is registered in the button, and run the application from the "Run" button on the menu icon to see how it works.
On the Excel Open screen, click the "Open Excel" button to open a dialog box. Select an appropriate Excel file or right-click to create a new Excel file and confirm that the Excel file is open.
If Excel is successfully launched, the application automatically moves to the Excel linkage screen, where you specify the number of rows and columns numerically, fill in the test data in the "Write to Excel" button in the "Write contents" field, and press the "Write to Excel" button.
If the test data is entered in the specified cell, it is successful.