1. Outline
If you want to convert the date display format, Unifinity handles it as follows
(Case 1) Converting a western year date into a western or Japanese year date with a different display format.
In this case, a string function can be used to convert the format.
The sample in this article describes the following cases
| Pre-conversion format | Example |
|---|---|
| yyyy/M/d | 7/5/2019 |
↓arrow (mark or symbol)
| Post-Conversion Format | Example |
|---|---|
| yyyy/MM/dd | Jul 05, 2019 |
| yyMMdd | 190705 |
| gEE/MM/dd | R01/07/05 |
| GGEE year MM DD day | July 05, 2001 |
| GGGEE year MMMM DD day | July 05, 2019 |
(Case 2) Convert a Japanese date into a Western date.
In this case, there is no string function to convert the format, so the conversion logic must be written by string functions or calculations.
The sample in this article describes the following cases
| Pre-conversion format | Example |
|---|---|
| EEMMdd | 300613 |
↓arrow (mark or symbol)
| Post-Conversion Format | Example |
|---|---|
| yyyy/MM/dd | 2018/06/13 |
*Converts 6-digit Japanese calendar without year number to Western calendar by assuming that the original year number is Heisei.
The sample project used in the explanation can be downloaded from the following link. We hope you will take advantage of it.
convert_AD_JpaneseCalendar.zip
2. Operation image
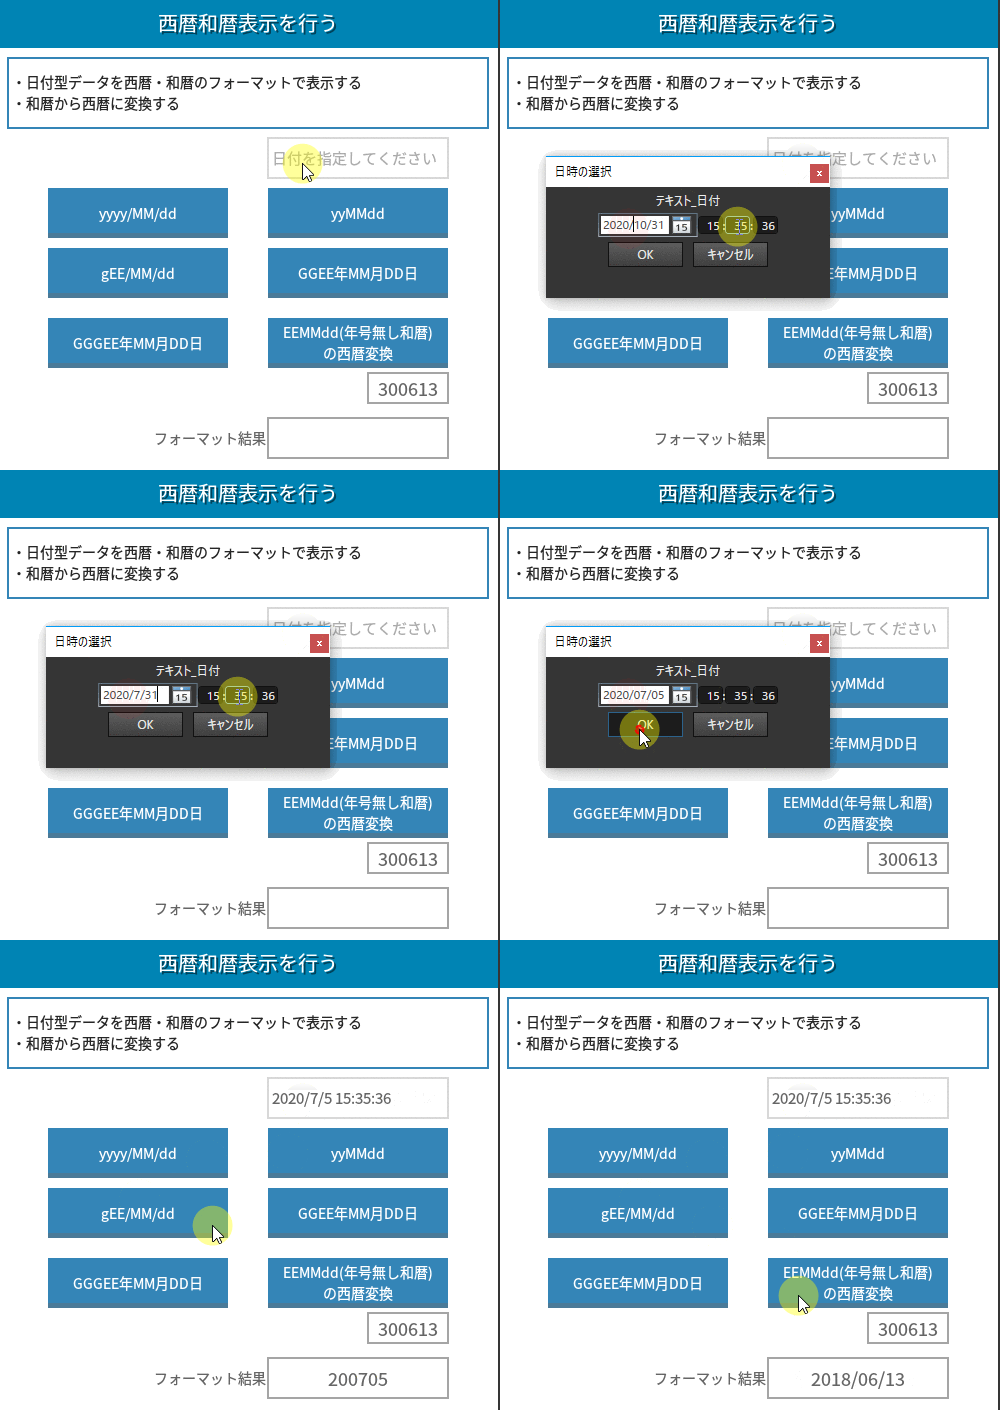 |
3. Implementation method (explanation of key points only)
3-1. Screen Creation
Create a new screen and place the necessary controls.
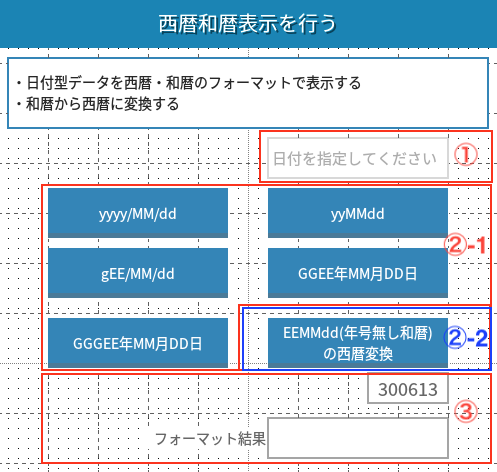
(1) Text
This control is used to enter the date of the year before conversion.
(2) Button
②-1
Converts the date entered in "1) Text" to the format indicated on the button.
2-2
Converts the Japanese calendar date on the label below the button to the format indicated on the button.
*In this example, instead of entering the Japanese calendar, a fixed value for the label is used.
(3) Label
300613: Arbitrary Japanese calendar date to be converted using button "②-2".
Formatting Result: Click the button in (2) to display the converted date.
3-1-1. Screen Control Settings
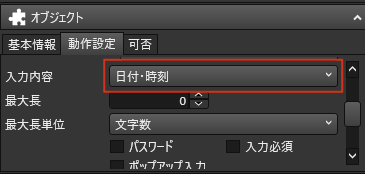
Set up a dialog to enter text before conversion in a dialog like the one in the video image of the operation.
Go to "Object" > "Behavior Setting" and select "Input Contents" and set it to "Date/Time".
3-2. Logic implementation
3-2-1. Conversion from Western calendar date (simple string function)
This is the logic when button (2)-1 is clicked. There are five buttons, but as an example, the "yyyy/MM/dd" button will be explained.
The process is as follows

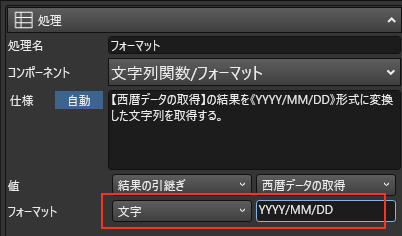
In the "2. Format" process, "String Function" and "Format" are set for the component.
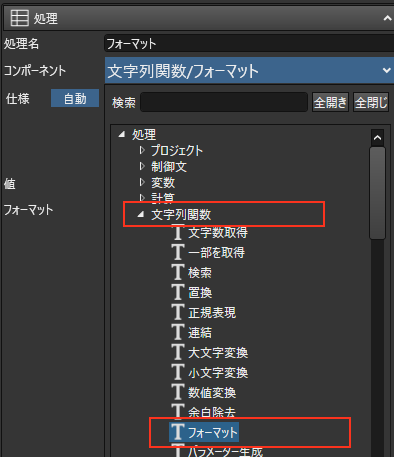
Then, in "Format," set the format you wish to convert to.
3-2-2. Conversion from Japanese calendar date
This is the logic when button (2)-2 is clicked. The process is as follows

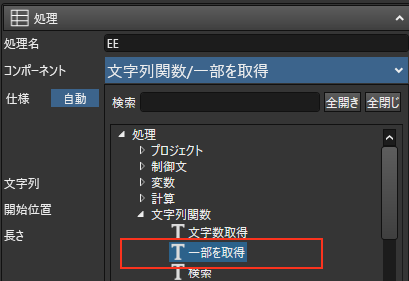
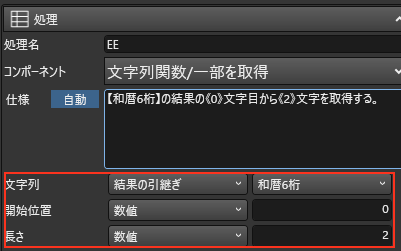
After obtaining the Japanese calendar date before conversion (6-digit string), set the component to "Get part of" for "String function" and break it down into year, month, and day, two digits from the beginning. The figure below shows the year, but the same applies to the month and day, setting the starting position to "2" and "4" respectively.
Next, convert the year to the western calendar year. Since the first year of the Heisei era is 1989 AD, add 1988 to the year to obtain the western calendar.
Then, create the date/time data in the component "Date/Time" "Create". Set the year converted to the western calendar, the month and day decomposed, and set 0 for the hour, minute, and second.
This creates data that can be treated as a western calendar year.
3-3. Logic calls from the screen
Set each button to each logic as an execution process.

This completes the implementation.